How is a traditional leaded window panel made in the workshop?
Being a traditional craft there are variations on some of the techniques and tools used to make a traditional leaded light, however the process described here is one that has been used for many years – and applies to making a new leaded light panel.
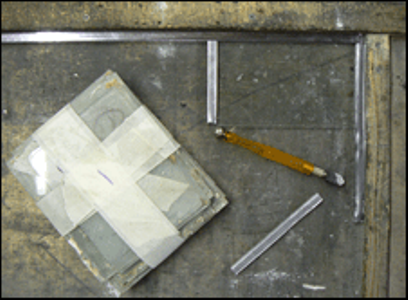
Planning & Cutting Glass
Generally leaded light panels are made up of many square or diamond pieces of glass (quarries) separated by lead came, and often vary in size within the panel. So careful planning is required when cutting new glass, so that the lead cames align in adjacent panels (or to saddle bars if needed) and the overall dimensions are met. Clearly at this stage the grade of restoration glass is chosen to match existing or at the clients request. Glass with significant amounts of ripples, bubbles and seeds would be the highest grade but also affects the cost of the leaded light panel significantly. The lead came is selected usually to match any installed panels and generally either 9mm or 12mm (1/2 inch) wide and either flat or round(ed) edges.
Being a traditional craft there are variations on some of the techniques and tools used to make a traditional leaded light, however the process described here is one that has been used for many years – and applies to making a new leaded light panel.
Building the leaded light
The leaded light is built on a flat bench with two straight strips of wood are nailed to it to form the bottom and left edges as depicted. Lead strips are then laid against the edges to form the border, slightly longer than the lead panel overall size. Glass pieces are then placed against the border, and lead came cut to appropriate size (using a sharp bladed knife) is used to separate the following pieces. This process continues until all pieces are laid and the remaining border leads are fitted. Borders are squared up ready for soldering.
Soldering
On each and every lead joint tallow is applied as a flux. Flux is used to allow the solder to flow more freely and adhere better to the lead making the soldered joint stronger. We tend to use Grade K solder which has a higher tin content (60/40) and therefore lower melting point and suitable for leaded and finer work with stained glass. The soldering irons used these days tend to be electric and we use a 200w appliance as standard but minimum 100w is realistic.
Historically gas irons were used, which are still available and in use but not as convenient. When all joints have been completed the excess tallow is brushed off and the panel turned over to solder the other side.
Cementing
The panel is laid face up on the bench and leaded light cement is forcefully brushed into the recesses of the lead came repeatedly, filling the gap between glass and H-section. The panel is turned over and the process repeated so that each and every joint is well filled with cement. Whiting is then sprinkled over the panel to absorb the excess cement and then brushed off gently so removing all the surplus cement from the lead. Any residue on the glass is left at this stage. The panel is turned over and the process is repeated. Drying time is minimum 24 hours but up to 48 hours – no longer or the cement will dry too hard.
Picking and Polishing – the final process before fitting
Once the initial drying time is complete, any and all excess cement adjacent to the lead is scraped with a pick or square blade and trimmed back flush. The panel is then brushed and quickly cleaned to remove all whiting and loose cement, before leaving another 24-48 hours to further harden.
After this further drying time, in order to get the traditional dark antique lead appearance a black grate polish is applied to the lead with a brush – and then buffed to a bright gunmetal patina. Usually glass cleaner and a square blade are then needed to remove excess traces of both the grate polish and any other excess material. If the leaded light is being fitted to glazing or saddle bars then copper ties would be soldered to the panel at the appropriate points so then can secure.
Fitting
Extreme care needs to be taken when moving and fitting a new leaded light panel back into the window or door frame. Although reasonably durable the glazing should be handled carefully, especially when being pinned into place before silicon or putty – as the glazing inside can easily crack if handled roughly meaning a return to the workshop. When attaching into a metal or crittall window frame we would usually suggest glazing tape to secure and either silicon or putty glaze to finish. You need to make sure the panel is going to be water tight regardless of where it is sited.